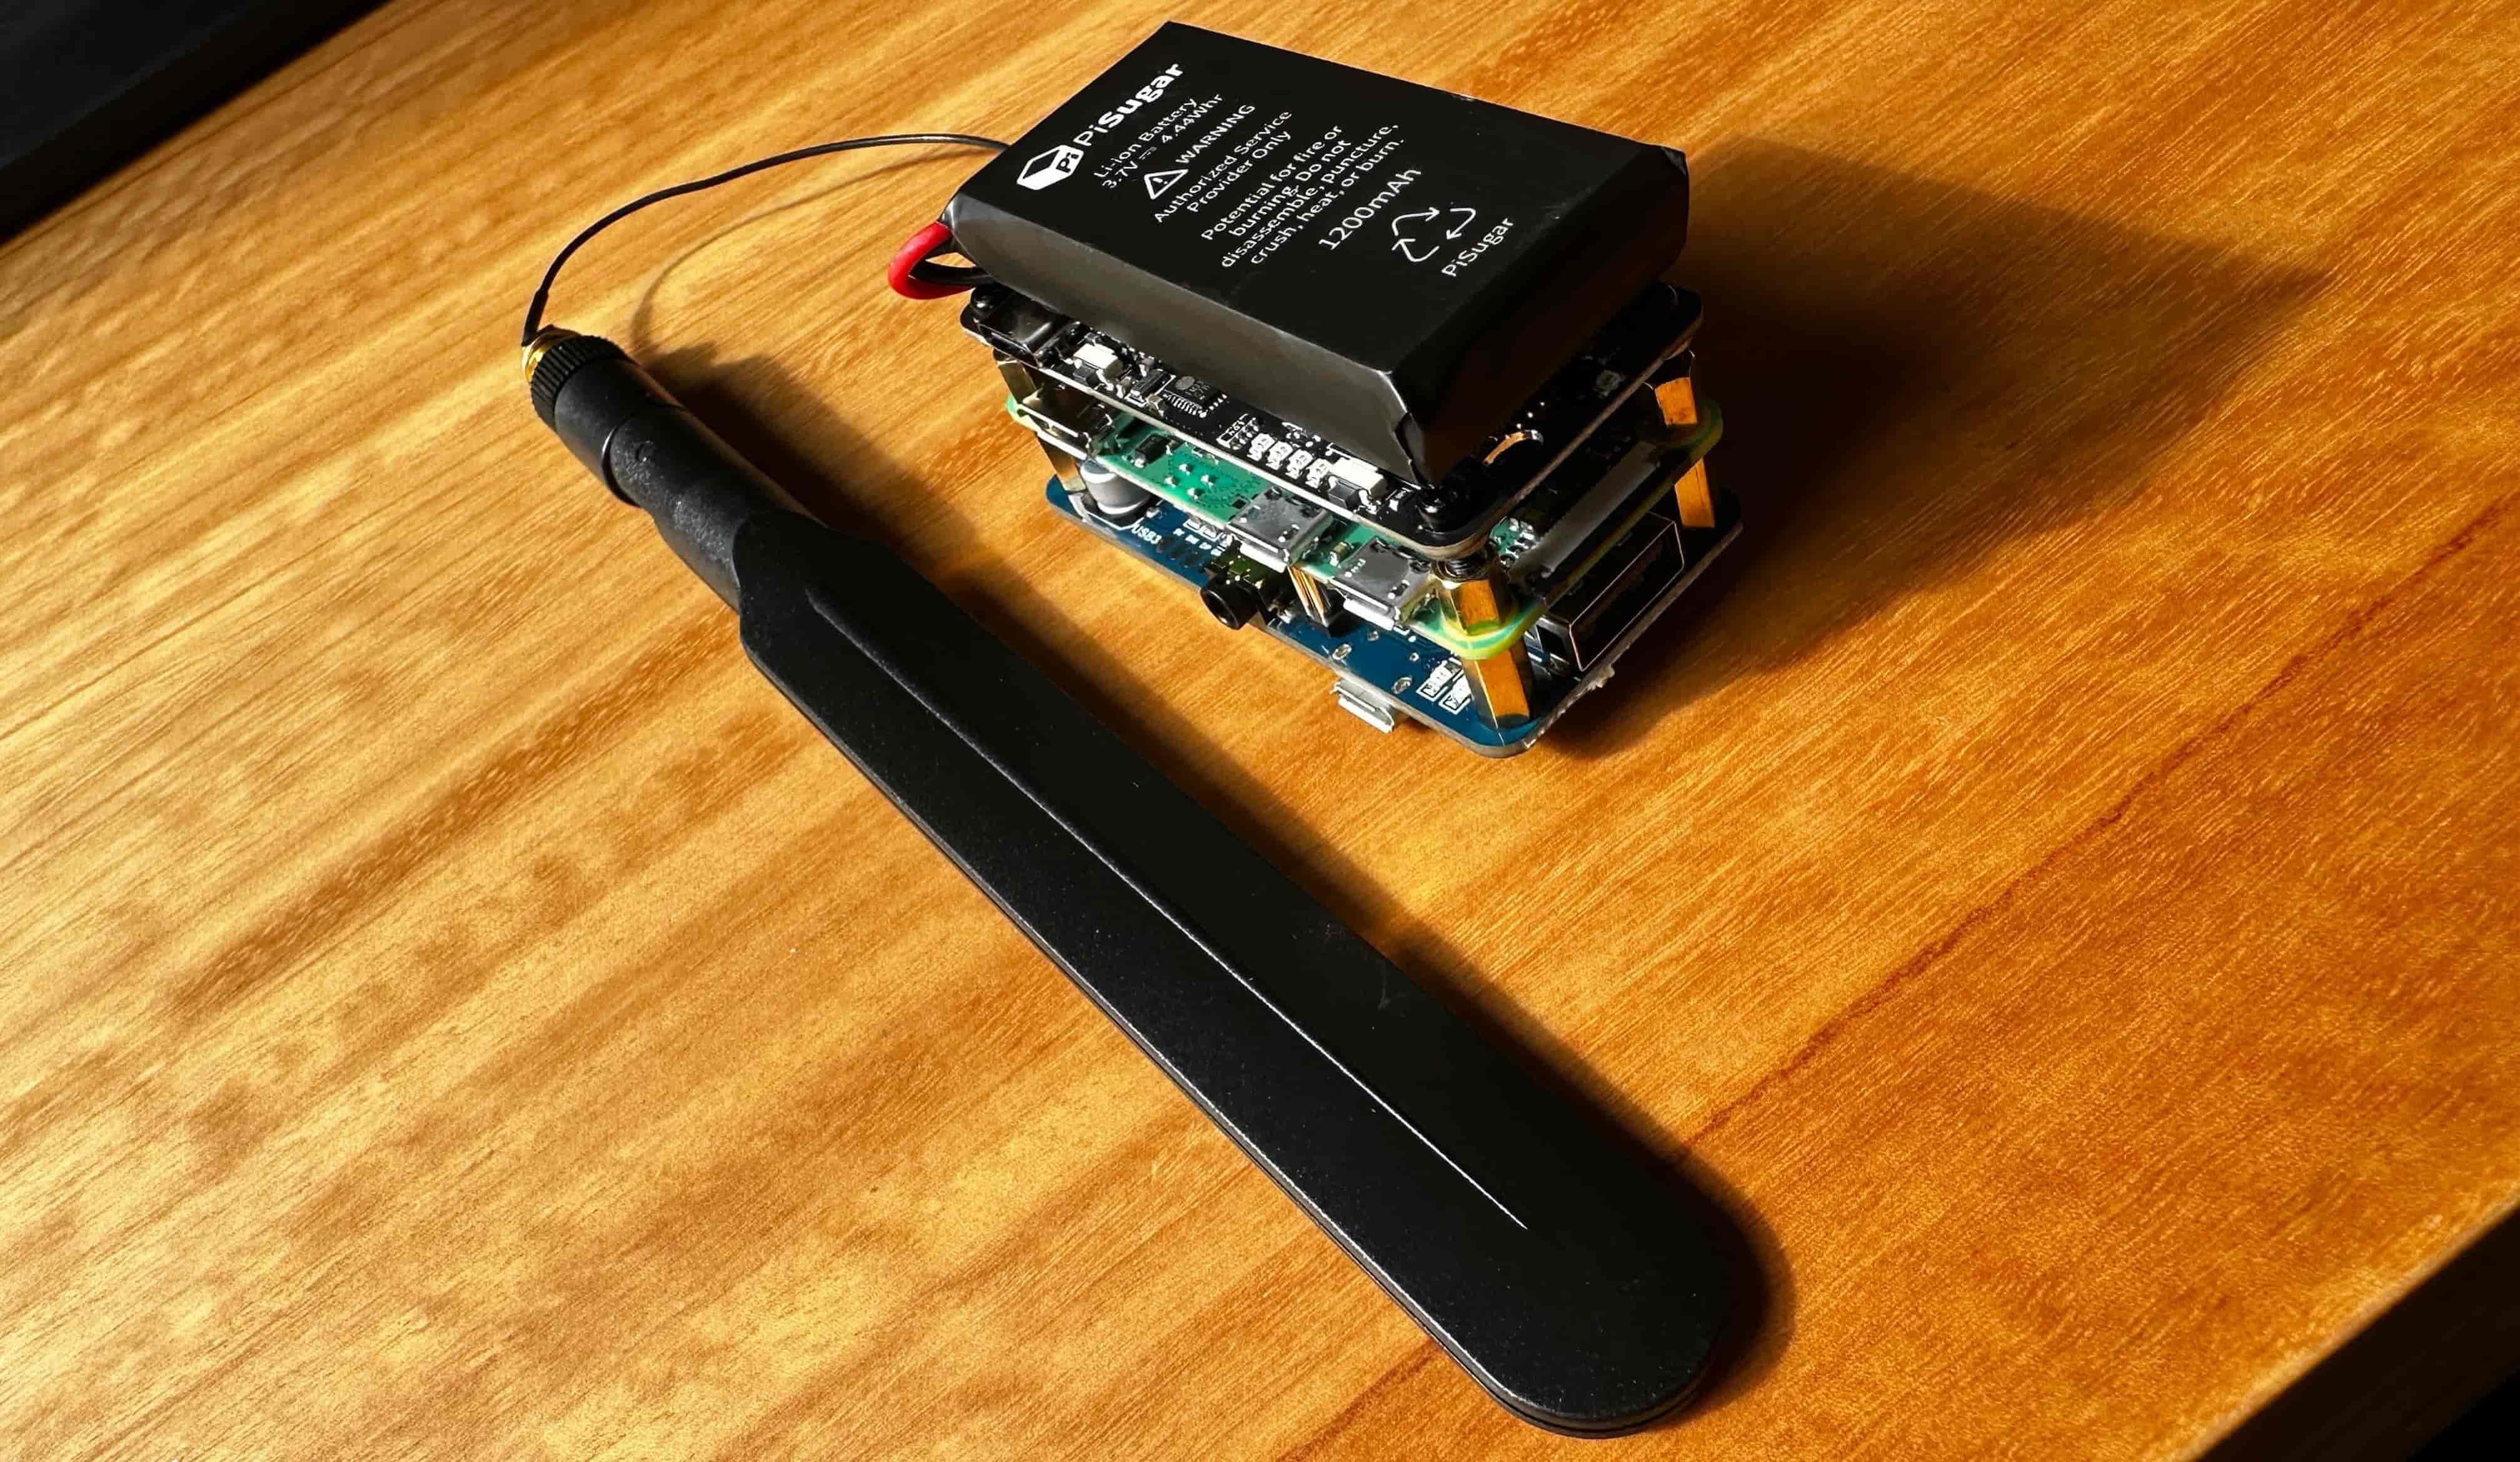
What if you could run a blog on 1W of power, served over 4G from a solar-charged Raspberry Pi Zero?
As software engineers, we spend most of our time in a world of virtually infinite cloud resources, where hard limits have been replaced by elastic bills and layers of abstraction (IaaS, PaaS, SaaS) that keep us far from the hardware. It’s easy to lose track of what’s possible with very little.
This is an experiment in doing more with less. Join me on this journey.
This is Part 1 of a 2-part series. Part 1 (this article) covers building and serving the blog over 4G using a Cloudflare Tunnel. Part 2 goes further off-grid: powering the whole setup with a solar panel and a battery hat, keeping it running through the night, setting up the GPS module on the hat, and a few tips to squeeze every milliwatt out of the Pi.
Requirements
Prerequisites before starting:
- A domain name added to Cloudflare (free plan) — see Cloudflare docs
- An SSH key pair on your machine (
~/.ssh/id_rsa)- Throughout this tutorial, replace
<user>with your chosen username (e.g.thylong) and<hostname>with your chosen hostname (e.g.solar)
Hardware
| Component | Costs |
|---|---|
| Raspberry Pi Zero 2 W (the Zero 2 W is recommended — it supports both 32-bit and 64-bit OS; the original Zero W is 32-bit only) | 18€ |
| Waveshare SIM7600G-H 4G hat | 75€ |
| Micro-SD card (min. 8Go) + MicroSD to SD adapter (to flash from a laptop) | 5€ |
| 10W 5V Solar panel USB-C | 25€ |
| Pi Sugar 3 Plus battery hat 1200 mAh — setup covered in Part 2 | 34€ |
| Nano SIM with mobile subscription | Starting at 1€/month |
| Total | 150€ + 1€/month |
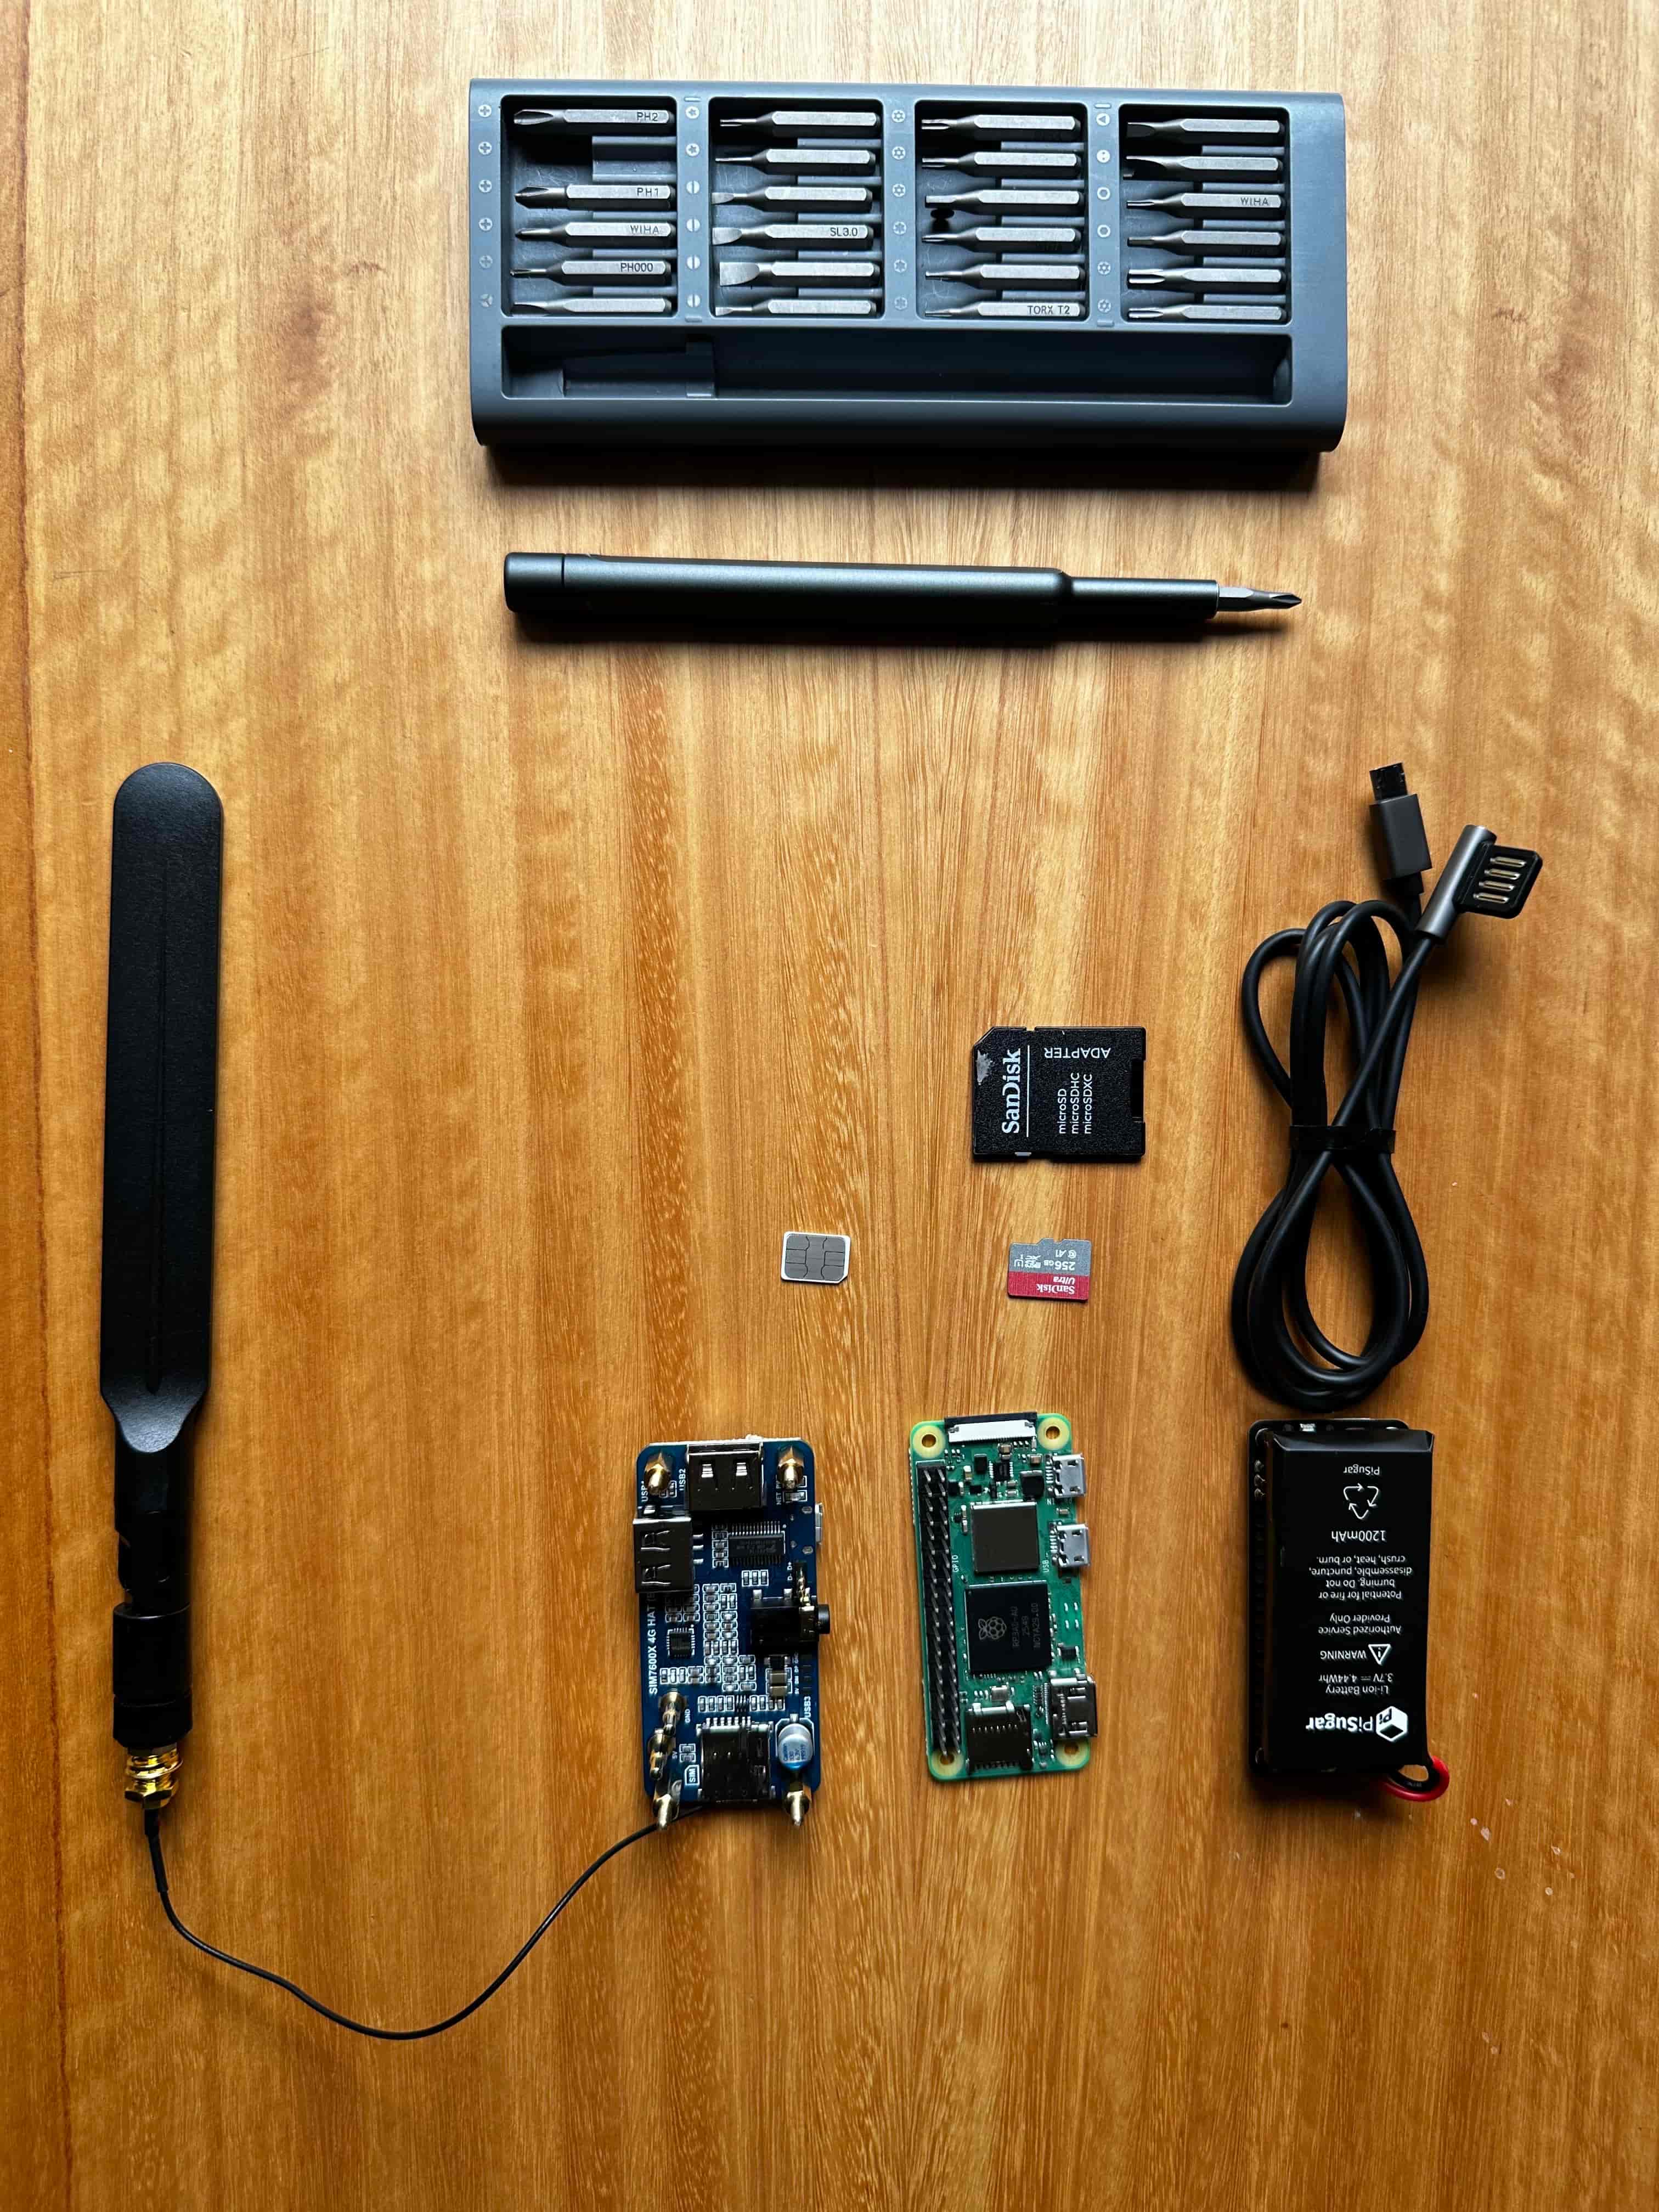
Notes: Many alternatives to this 4G hat are possible for tighter budgets, same for the battery.
Software
| Component | Costs |
|---|---|
| Domain setup on Cloudflare | ~ |
| Cloudflare tunnel | Free |
Steps
Hardware setup
- Turn off the Raspberry
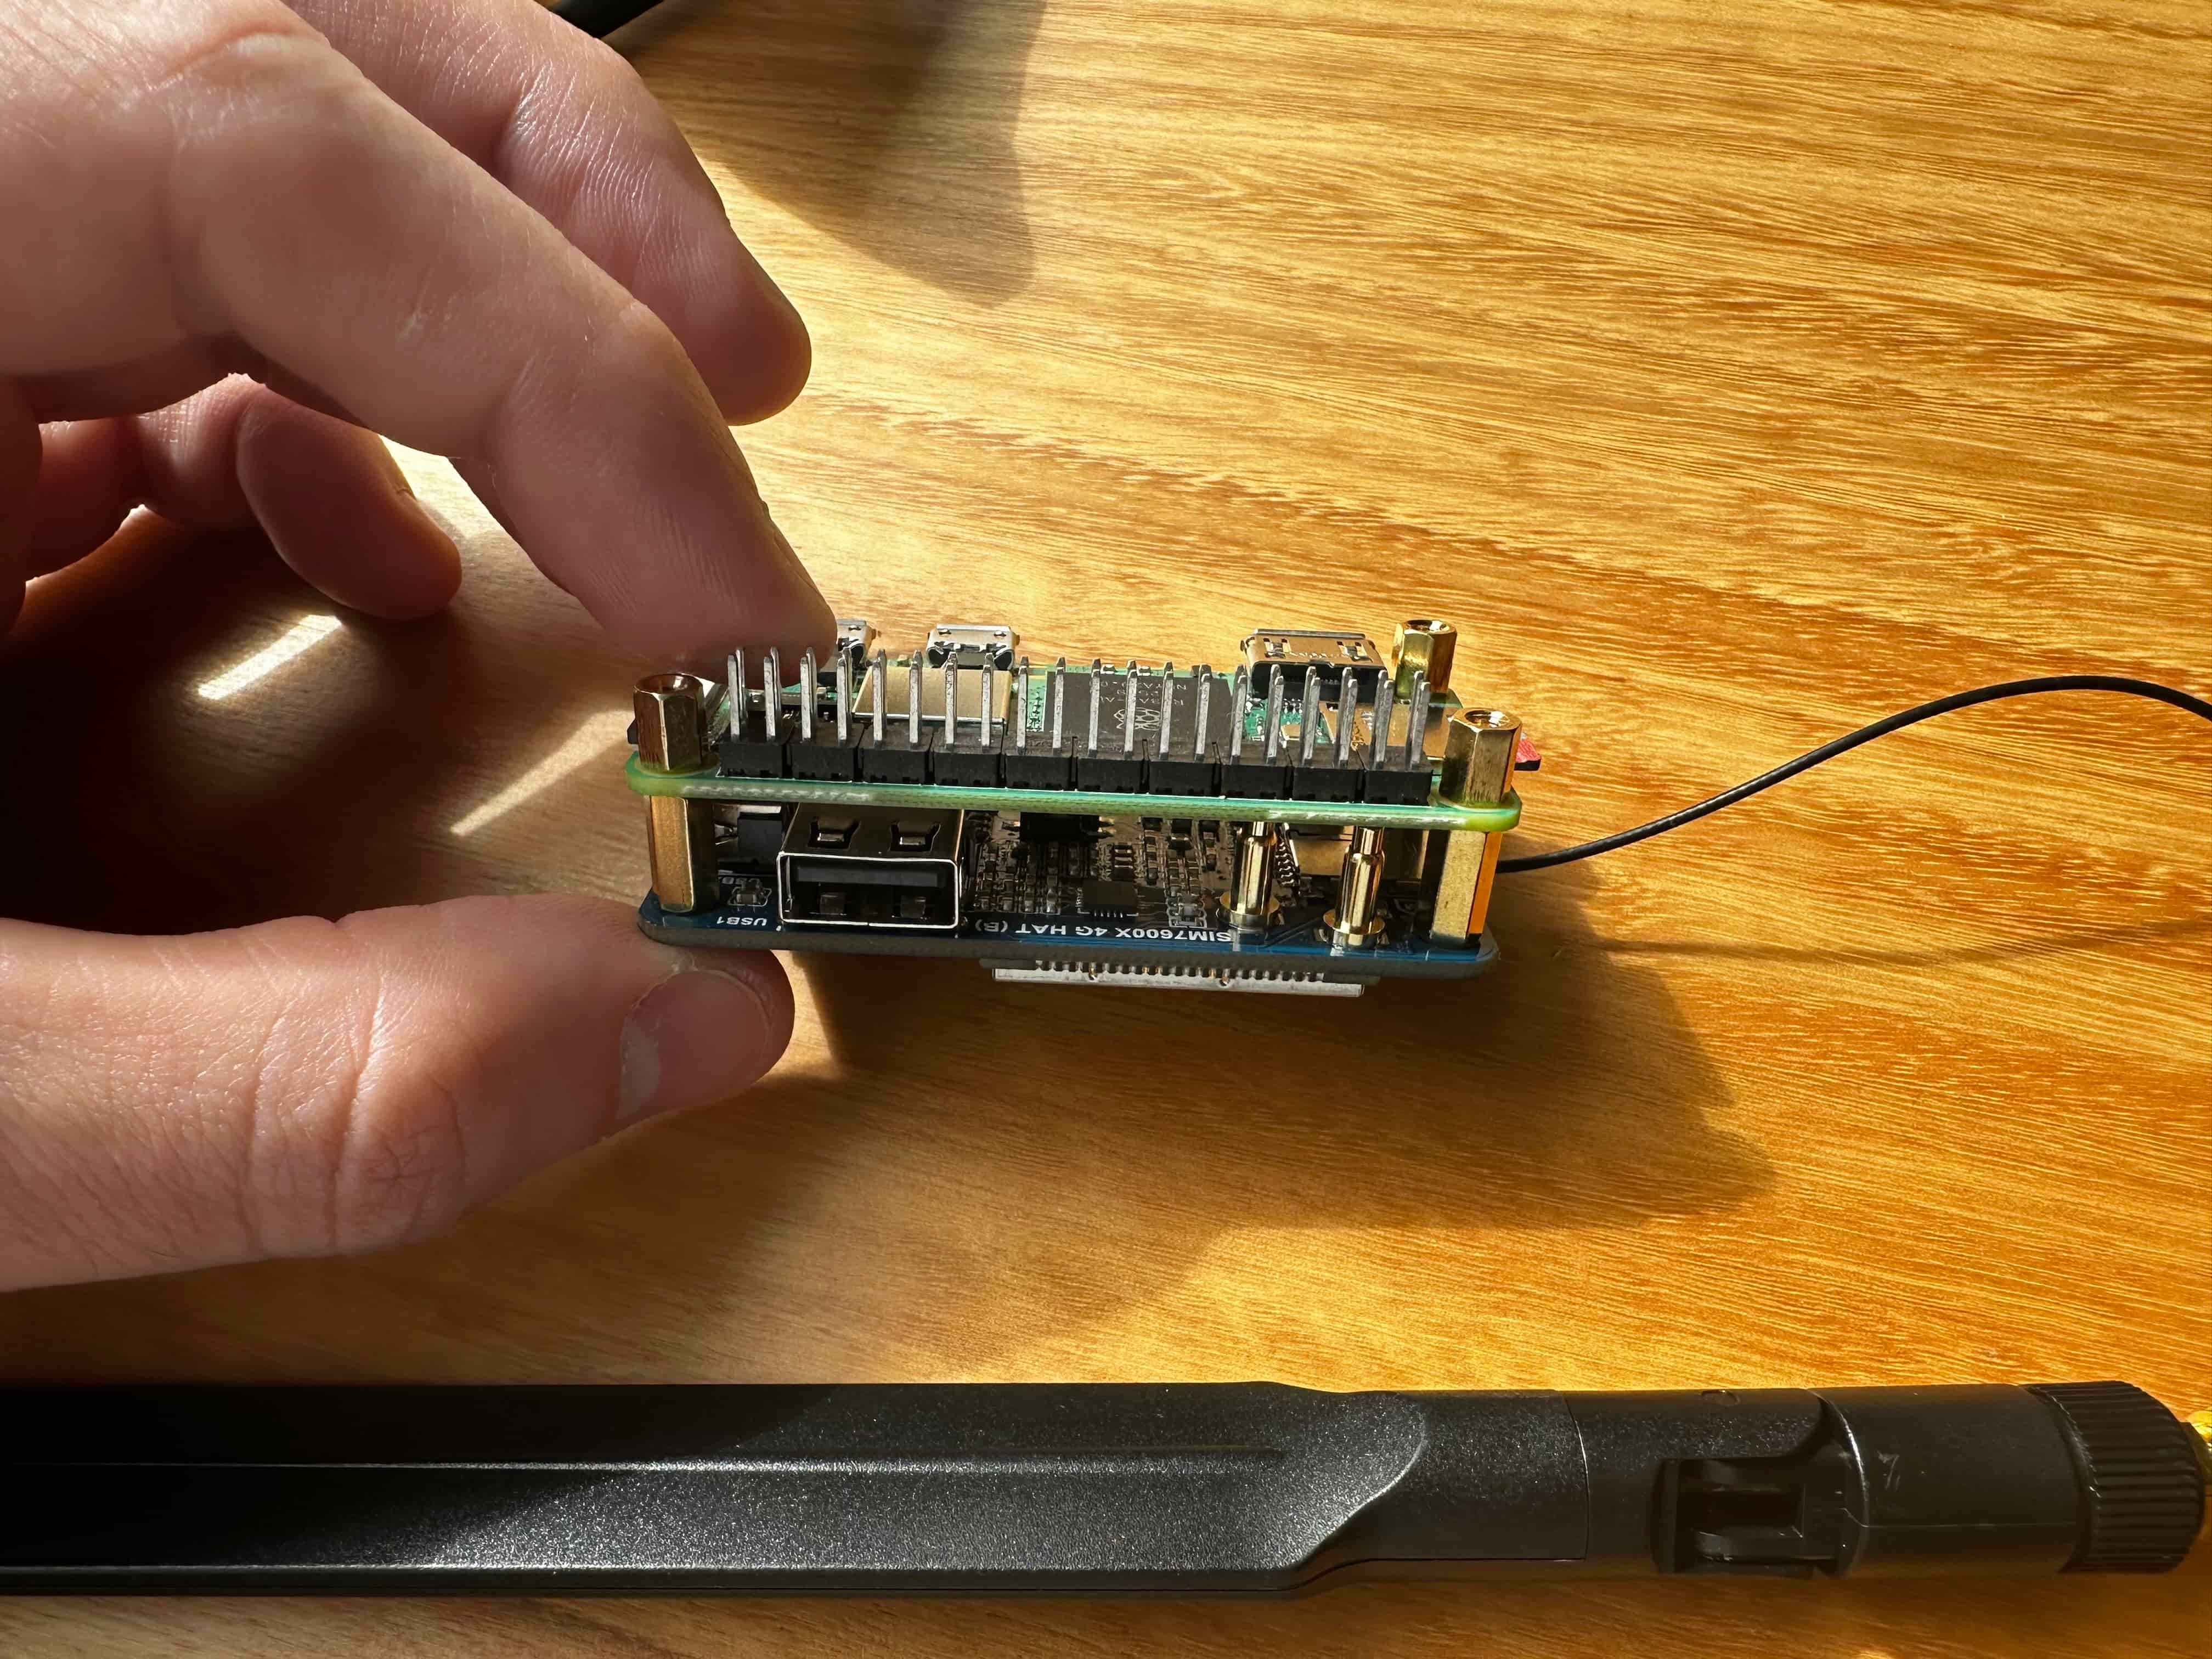
- Plug the hat on top of the Raspberry Pi 0, it should look like the following:
- Insert a nano SIM in the 4G hat
Software setup
Install the OS
Download Raspberry Pi Imager: https://www.raspberrypi.com/software/
Flash Raspberry Pi OS Lite (32-bit for Zero W, 64-bit for Zero 2 W) to your MicroSD card.
In the imager’s Advanced Options (the gear icon), before writing:
- Set the hostname (e.g.
solar) — this is how you’ll SSH in asssh <user>@solar - Set your username and password (e.g.
thylong) - Enable SSH with your public key
- Add your WiFi credentials — the Pi needs internet access on first boot to activate Raspberry Pi Connect
Note: If you don’t have a keyboard or display to connect to your Raspberry, ensure that you provide valid WiFi credentials and turn on Raspberry Pi Connect so you can use the screen sharing.
It can take a few minutes for the Raspberry to connect to the service. If after 5 minutes the device still doesn’t appear, it probably didn’t connect to the WiFi and/or internet successfully. You will have to redo the SD card flashing phase.
Common errors: a wrong WiFi SSID, password typo, or invalid auth key.
Configure the 4G/LTE hat
Boot the Raspberry Pi.
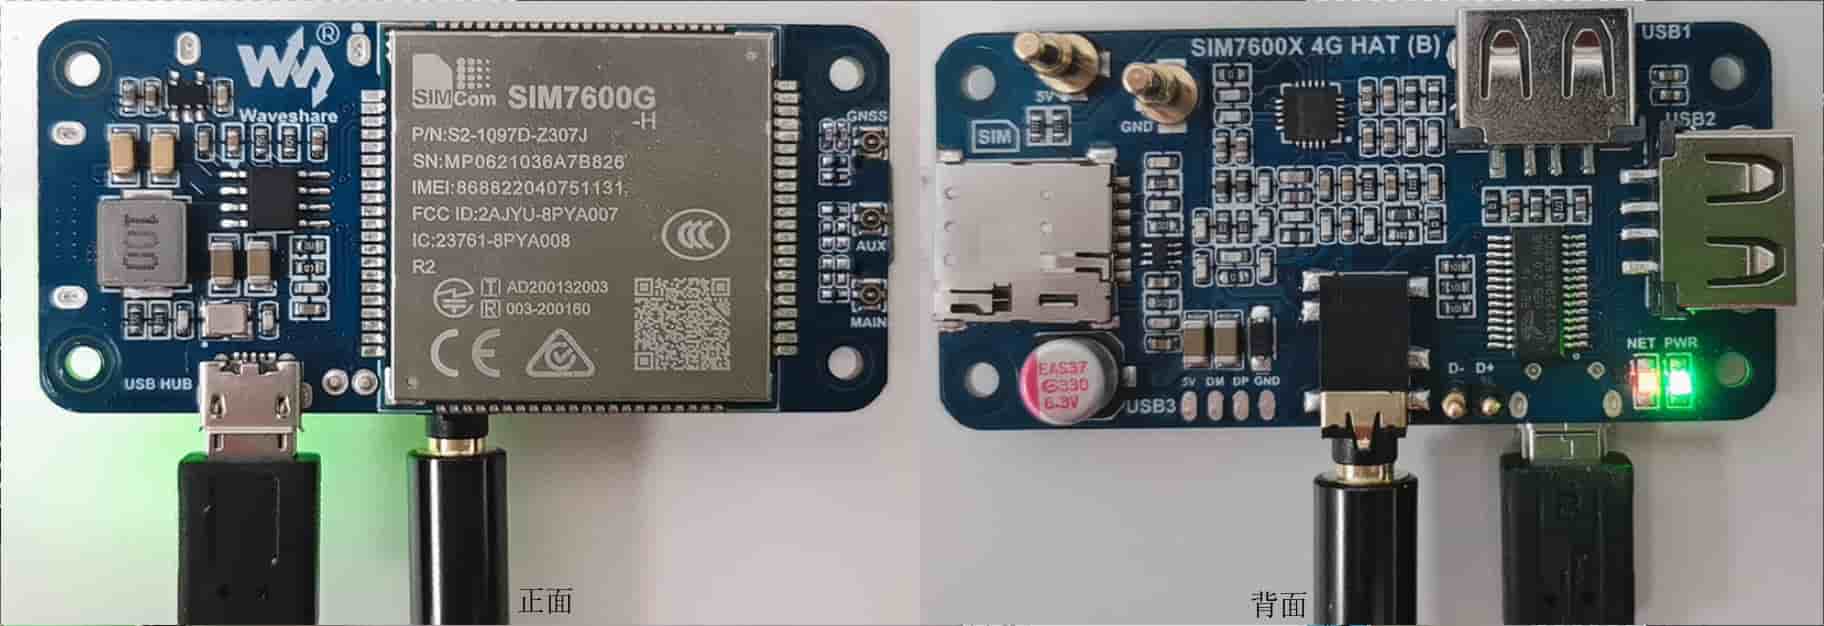
Ensure the hat is properly wired
Make sure the LEDs on the hat are:
- PWR light is on
- NET light blink pattern:
- Slow blink (1s on / 1s off) = searching for network
- Fast blink (100ms) = registered and connected ✓
If the NET light is off or blinking slowly after 30 seconds, the hat isn’t properly connected physically to the Raspberry Pi Zero or the SIM isn’t recognized.
Ensure hat connectivity from the Raspberry
Connect to Raspberry Pi Connect
Install required packages:
sudo apt update && sudo apt install -y minicom modemmanager network-manager
Open a terminal and ensure both these lines are present in the /boot/firmware/config.txt:
enable_uart=1
dtoverlay=disable-bt
These two lines free up the UART pins on the GPIO header, which the modem uses for serial communication. Without them, the hat may not be detected correctly.
If you make any change, reboot to apply (sudo reboot).
Then run ls /dev/ttyU* to list ttys, the Raspberry should have detected via USB the hat and output:
/dev/ttyUSB0 /dev/ttyUSB1 /dev/ttyUSB2 /dev/ttyUSB3 /dev/ttyUSB4
Here is a simple mapping of the ttys:
| Port | Function |
|---|---|
| /dev/ttyUSB0 | Diagnostic |
| /dev/ttyUSB1 | GPS/NMEA |
| /dev/ttyUSB2 | AT commands ← use this |
| /dev/ttyUSB3 | PPP / data |
| /dev/ttyUSB4 | Audio/other |
You can test the communication via the AT Command port:
sudo minicom -D /dev/ttyUSB2 -b 115200
Then:
- Press
Ctrl+AthenEto enable echo- Type
AT+ Enter - → should return
OK
- Type
- Then verify the SIM:
- Type
AT+CPIN? - → should return
+CPIN: READY
- Type
- Then verify the network
- Type
AT+COPS? - → should show Orange details (if you’re using Orange multi-SIM)
- Type
Other AT Commands for Testing for the curious:
| AT Command | Description | Return |
|---|---|---|
| AT | AT Test Command | OK |
| ATE | ATE1: Echo mode on, ATE0: Echo mode off | OK |
| AT+CGMI | Request manufacturer identification | OK |
| AT+CGMM | Request model identification | OK |
| AT+CGSN | Request product serial number identification | OK |
| AT+CSUB | Request product version | OK |
| AT+CGMR | Request firmware version | OK |
| AT+IPREX | Configure baud rate of model | +IPREX:OK |
| AT+CRESET | Reset model | OK |
| AT+CSQ | Query signal quality | OK |
| AT+CPIN? | Query SIM card status | +CPIN:READY |
| AT+COPS? | Query provider information | +COPS:OK |
| AT+CREG? | Query network registration status | +CREG: OK |
| AT+CPSI? | Query UE system information | |
| AT+CNMP | Select Network Mode | OK |
If you made it to this point, congratulations — the modem is ready for us to create connections!
If you’re facing any errors or not having the expected output when using minicom, check the output of
mmcli -L, it will help debugging.
To create the connection, run the following commands:
We use APN
orange(notorange.fr). Theorange.frAPN is used for tethering and disables IPv6 — we needorangeto get a public IPv6 address later.
sudo nmcli connection add type gsm ifname '*' con-name orange-4g apn orange
sudo nmcli connection up orange-4g
sudo nmcli connection modify orange-4g connection.autoconnect yes
To test the connection, use curl:
curl --interface wwan0 https://ifconfig.me
If you see your public IP, congratulations, you’re connected to 4G!
Enable IPv6 and make it persistent
Orange’s 4G blocks inbound connections on both IPv4 (CGNAT) and IPv6 (firewall). However, Cloudflare Tunnel needs to connect outbound on port 7844 — Orange blocks this on IPv4 but allows it on IPv6. We therefore need to configure dual-stack IPv4v6 and make it persist across reboots.
# Set initial EPS bearer to dual-stack
sudo mmcli -m 0 --3gpp-set-initial-eps-bearer-settings="apn=orange,ip-type=ipv4v6"

# Reconnect with dual-stack
sudo mmcli -m 0 --simple-disconnect && sleep 3 && sudo mmcli -m 0 --simple-connect="apn=orange,ip-type=ipv4v6"

# Read IPv6 config from bearer and apply to wwan0
BEARER=$(mmcli -m 0 --output-json | grep -o "/org/freedesktop/ModemManager1/Bearer/[0-9]*" | tail -1)
IPV6=$(mmcli -b ${BEARER##*/} --output-json | grep -oP '"address"\s*:\s*"\K[0-9a-f:]+(?=")' | head -1)
GW=$(mmcli -b ${BEARER##*/} --output-json | grep -oP '"gateway"\s*:\s*"\K[0-9a-f:]+(?=")' | head -1)
sudo ip -6 addr add ${IPV6}/64 dev wwan0
sudo ip -6 route add default via ${GW} dev wwan0

# Verify — should return your public IPv6
curl -6 -s --interface wwan0 https://ifconfig.me && echo
The IPv6 address assigned above is lost on reboot. To make it persistent, create a oneshot systemd service that re-applies it after each modem connection:
sudo tee /usr/local/bin/apply-ipv6.sh << 'EOF'
#!/bin/bash
sleep 5
BEARER=$(mmcli -m 0 --output-json | grep -o "/org/freedesktop/ModemManager1/Bearer/[0-9]*" | tail -1)
IPV6=$(mmcli -b ${BEARER##*/} --output-json 2>/dev/null | grep -oP '"address"\s*:\s*"\K[0-9a-f:]+(?=")' | head -1)
GW=$(mmcli -b ${BEARER##*/} --output-json 2>/dev/null | grep -oP '"gateway"\s*:\s*"\K[0-9a-f:]+(?=")' | head -1)
if [ -n "$IPV6" ] && [ -n "$GW" ]; then
    ip -6 addr add ${IPV6}/64 dev wwan0 2>/dev/null || true
    ip -6 route add default via ${GW} dev wwan0 2>/dev/null || true
fi
EOF
sudo chmod +x /usr/local/bin/apply-ipv6.sh
sudo tee /etc/systemd/system/wwan-ipv6.service << 'EOF'
[Unit]
Description=Apply IPv6 to wwan0
After=ModemManager.service network-online.target
Wants=network-online.target

[Service]
Type=oneshot
ExecStart=/usr/local/bin/apply-ipv6.sh
RemainAfterExit=yes

[Install]
WantedBy=multi-user.target
EOF

sudo systemctl daemon-reload && sudo systemctl enable --now wwan-ipv6
Verify IPv6 survives a reboot:
sudo reboot
# after reconnecting:
ip -6 addr show wwan0
# expected: a global IPv6 address (starting with 2a01: or similar)
Set up the web server
As CGNAT and Mobile Carriers firewalls often block inbound requests on their 4G networks, we need to use a reverse tunnel. Many solutions are available: Cloudflare Tunnel, using a VPS to do traffic forwarding, etc.
We will use Cloudflare tunnel for simplicity, costs and as it doesn’t require additional resources. In this tutorial we assume you already acquired and set up your domain on Cloudflare (see prerequisites above).
Deploy Hugo blog to the Raspberry Pi with darkhttpd
Build the Hugo site locally
Install Hugo and scaffold a new site with a theme:
# Install Hugo (macOS)
brew install hugo

# Create a new site
hugo new site myblog && cd myblog

# Add a theme (e.g. Ananke)
git init
git submodule add https://github.com/theNewDynamic/gohugo-theme-ananke.git themes/ananke
echo "theme = 'ananke'" >> hugo.toml

# Create your first post
hugo new content posts/hello-world.md
# Edit content/posts/hello-world.md, set draft: false

# Preview locally
hugo server
When ready to deploy, build the production site:
hugo --environment production --minify
This generates the static site in public/ (all the HTML, CSS, JS and assets ready to be served).
Sync to the Pi
Replace <user> and <hostname> with the values you set in the imager.
ssh <user>@<hostname> 'sudo mkdir -p /var/www/myblog && sudo chown <user>:<user> /var/www/myblog'
rsync -avz --delete public/ <user>@<hostname>:/var/www/myblog/
Install darkhttpd
ssh -t <user>@<hostname> 'sudo apt-get update -qq && sudo apt-get install -y -qq darkhttpd'
Create the systemd service
The tunnel will be configured to point to http://localhost:8080, so darkhttpd must listen on port 8080.
sudo tee /etc/systemd/system/myblog.service << 'EOF'
[Unit]
Description=My blog (darkhttpd)
After=network-online.target
Wants=network-online.target

[Service]
Type=simple
ExecStart=/usr/bin/darkhttpd /var/www/myblog --port 8080
Restart=always
RestartSec=5

[Install]
WantedBy=multi-user.target
EOF
Enable and start
sudo systemctl daemon-reload
sudo systemctl enable --now myblog
sudo systemctl status myblog
Expected output: Active: active (running)
Verify locally
curl -s http://localhost:8080/ | head -5
Expected output: the first lines of your blog’s HTML. The blog is now served on port 8080, ready for the Cloudflare Tunnel to forward traffic to it.
Set up Cloudflare tunnel
Caveat: Orange blocks port 7844 on IPv4
cloudflaredconnects to Cloudflare’s edge on port 7844 (QUIC). Orange blocks this on IPv4 but allows it on IPv6. We forcecloudflaredto use IPv6 with--edge-ip-version 6— this is why the IPv6 persistence setup above is required before this step.
Create the tunnel in Cloudflare
- Go to Cloudflare Zero Trust https://one.dash.cloudflare.com → Networks → Tunnels
- Create a tunnel (e.g.
solar) - Add public hostname:
solar.<your_domain>.com→http://localhost:8080 - Copy the tunnel token
Install cloudflared on the Raspberry Pi
curl -fSL -o /tmp/cloudflared https://github.com/cloudflare/cloudflared/releases/latest/download/cloudflared-linux-arm
sudo mv /tmp/cloudflared /usr/local/bin/cloudflared
sudo chmod +x /usr/local/bin/cloudflared
Store the tunnel token
sudo mkdir -p /etc/cloudflared
echo 'TUNNEL_TOKEN=<your-token>' | sudo tee /etc/cloudflared/env
sudo chmod 600 /etc/cloudflared/env
Create the systemd service
sudo tee /etc/systemd/system/cloudflared.service << 'EOF'
[Unit]
Description=Cloudflare Tunnel
After=network-online.target
Wants=network-online.target

[Service]
Type=simple
ExecStart=/usr/local/bin/cloudflared tunnel --no-autoupdate --edge-ip-version 6 run --token ${TUNNEL_TOKEN}
EnvironmentFile=/etc/cloudflared/env
Restart=always
RestartSec=5

[Install]
WantedBy=multi-user.target
EOF
The key flag is --edge-ip-version 6: this forces cloudflared to connect to Cloudflare over IPv6, bypassing Orange’s port 7844 block on IPv4.
Enable and start
sudo systemctl daemon-reload
sudo systemctl enable --now cloudflared
sudo systemctl status cloudflared
Expected output: Active: active (running)
Verify
journalctl -u cloudflared --no-pager -n 10
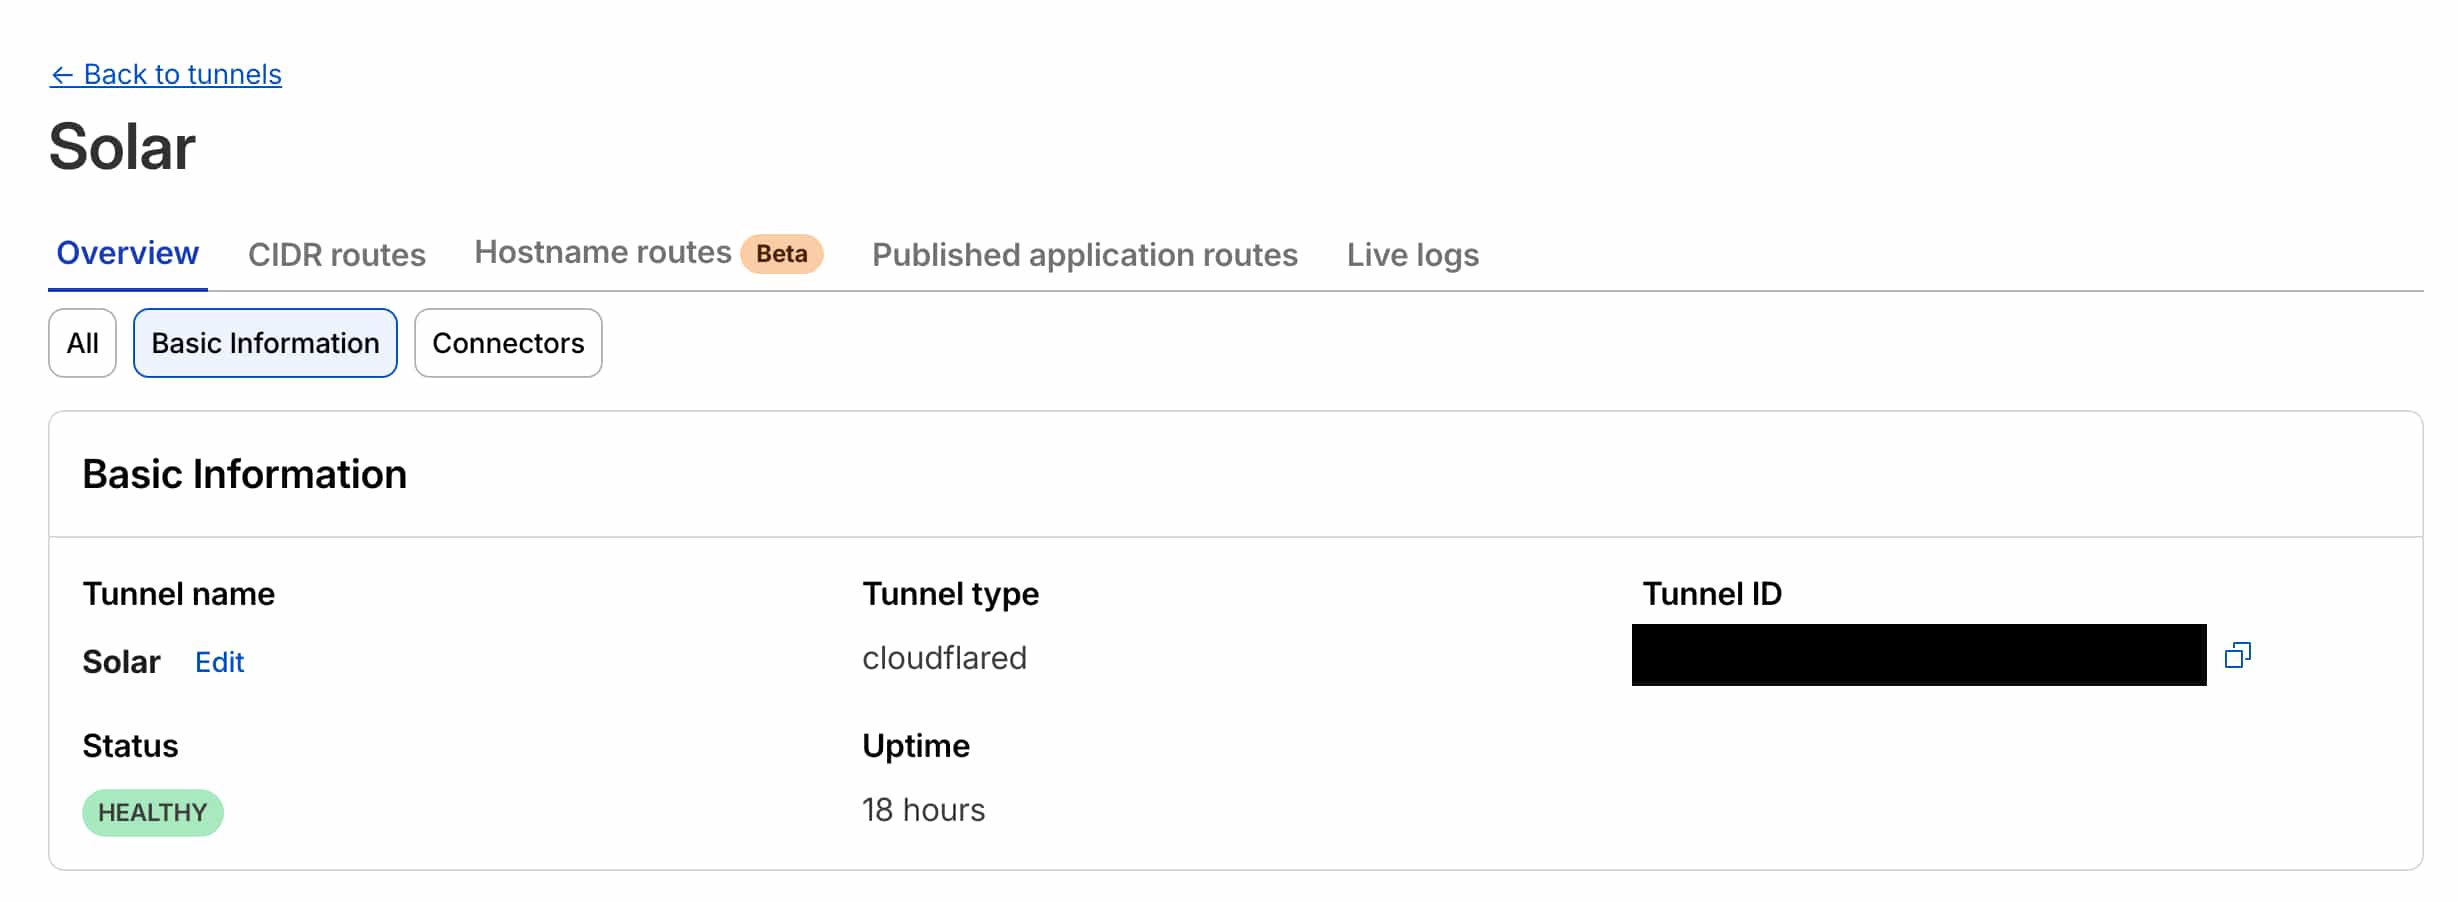
Look for a line containing Connection established or Registered tunnel connection — this confirms the tunnel is up. You will also see the tunnel labelled as Healthy in the Cloudflare Zero Trust dashboard.
Then from any device: curl https://solar.<your_domain>.com/
What’s next — Part 2: Going fully off-grid
The blog is live, served over 4G, tunnelled through Cloudflare. But it’s still plugged into a wall.
In Part 2 we’ll cut the cord entirely:
- Solar panel — wiring a 10W USB-C panel to keep the Pi powered during the day
- Battery hat (Pi Sugar 3 Plus) — storing energy to survive nights and cloudy days
- GPS — using the built-in GPS module on the SIM7600 hat to geotag the device
- Power tips — disabling unused hardware (HDMI, LEDs, USB) to stretch every milliwatt
Miscellaneous
Useful links
- How to set up Raspberry Pi Zero W as a 3G/4G router
- Waveshare SIM7600G-H 4G Hat (B) manual
- Tutorial - 4G and GPS HAT For Raspberry Pi - Waveshare SIM7600X
- Video Tutorial - 4G and GPS HAT For Raspberry Pi - Waveshare SIM7600X
- The solar powered Low Tech Journal
- How-to build a low tech website: Software & Hardware
- Relaying Traffic to Self-Host with CGNAT